Arc beats Python for a web-controlled stereo

I recently set up a web interface to my stereo, implementing it in both Python and Arc. I found that, much to my surprise, writing the Arc implementation was much easier than the Python implementation in this case.

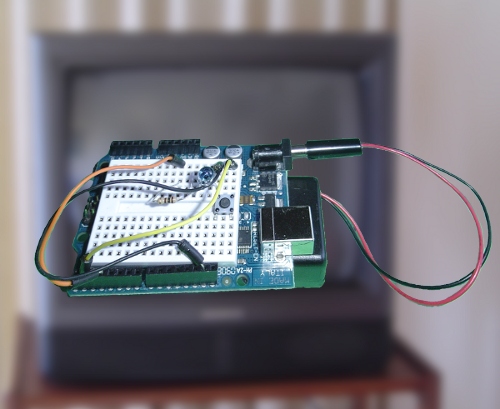
In my stereo controller system, I go to a web page that has an image of the appropriate remote control, and click the button. The Javascript in the web page sends a hex code back to the server, which sends the code to an Arduino microcontroller board, which converts the code into an infrared signal. The stereo interprets this signal as a command from the remote control and performs the desired action. It sounds complicated, but it responds quickly, even if I use the browser on my cell phone. I wrote up more details on the system earlier.
Remote control on G1 phone
The web server for this project is fairly straightforward: it needs to serve some static HTML pages and images, and needs to receive POST messages and forward the data over the serial port to the Arduino. I originally wrote the code in Python:

import cgi
import serial

from BaseHTTPServer import HTTPServer
from SimpleHTTPServer import SimpleHTTPRequestHandler

class MyHandler(SimpleHTTPRequestHandler):
  def do_POST(self):
    if self.path == '/arduino':
      form = cgi.FieldStorage(fp=self.rfile, headers=self.headers,
        environ={'REQUEST_METHOD':'POST'})
      code = form['code'].value
      print 'Sent:', code
      arduino.write(code)
      self.send_response(200)
      self.send_header('Content-type', 'text/html')
      return
    return self.do_GET()

arduino = serial.Serial('/dev/ttyUSB0', 9600, timeout=2)
server = HTTPServer(('', 8080), MyHandler).serve_forever()
The Python web server is based on SimpleHTTPServer. To handle POST requests to the /arduino URL, I made a simple handler subclass that pulls the data out of the response, sends it to the serial port, and returns a blank response. The last two lines open the serial port and start up the server. The static web page serving comes "for free."

After writing this, I decided to try writing a version in Arc:

(= srvops* (table))

(= arduino-serial (outfile "/dev/ttyUSB0" 'binary))

(defopr || req "/index.html")

(defop arduino req (w/stdout (stderr)
  (let code (arg req "code")
    (write code arduino-serial)
    (prn "Sent code:" code))))

(thread (serve 8080))
Since you may not be familiar with the Arc web server, I'll give a brief explanation. The first line clears out the server's default pages (login, whoami, prompt, etc) that make sense for news.yc, but not for me. The next line opens the serial port. Next, the mysterious || redirects the home page. The next four lines are the handler for "/arduino": the "code" parameter is pulled out of the request (req). The code is written to the serial port, and printed to the log. The last line starts a serving thread on port 8080.

I'm not going to count tokens since that's a silly metric, but the Arc code is a clear winner here. The first Python disadvantage is the hideous cgi.FieldStorage call to parse the POST data; apparently this is the way to do it, but it took me considerable time to get this right. The second Python disadvantage is the necessity to set up the return code and content-type for the response. I ended up with a browser-specific bug when I didn't have this right, since some Javascript interpreters expect a particular response. Arc automatically sends a valid response. The main Arc disadvantage is there's no real serial port support; the Arc code just opens the port and hopes for the best. On the other hand, Python's serial library lets you set the baud rate, timeouts, and other parameters.

Arc and Python have a few more minor differences. Python requires imports, which Arc doesn't. Arc has the silly clearing of srvops* to avoid unwanted pages. Starting the server thread is simpler in Arc but not as flexible.

To summarize, I found the Python code difficult and error-prone to write, and the Arc code was shorter and just worked. This was a surprise to me; usually I find Python straightforward and Arc gives me pain when I have to write a bunch of code for some trivial thing it doesn't support. (For example, generating a time string in my temperature monitoring.) In this case, however, Arc came out ahead. Perhaps this is because Arc's flagship application is a web server, so it handles web serving well.

Obviously this is a fairly trivial program - the complexity is actually in the Javascript code and the C++ code on the Arduino - so I'm not claiming this as an overall victory for Arc over Python. But it's still interesting to find Arc came out ahead in this case.

TV-B-Gone for the Arduino

I've ported the TV-B-Gone code to run on the Arduino board. If you haven't seen a TV-B-Gone, it's a cute gadget that you point at a TV that's bothering you, and it turns the TV off. Internally, it's an infrared remote that broadcasts more than 100 different off codes that work on almost any TV. I figured it would be interesting to get the TV-B-Gone running on the Arduino.
TV-B-Gone running on an Arduinio

Update (November 2010)

I have a new, improved version of the software. Details and download are here.

The software

I started with the TV-B-Gone firmware, which is available under Creative Commons license. The TV-B-Gone runs on an ATtiny85 microcontroller, not the ATmega328 used by the Arduino, so some porting was required. One tricky part of the port is the IR signals are generated using the low-level hardware timer for PWM (pulse-width modulation). Since the ATtiny85 runs at 8MHz, and the Arduino runs at 16MHz, the timing code needed to be re-written, both the 10us delay loop and the timer register operations. The quick summary is I'm using Timer 2, scaling the clock by 8, using OCR2A to control the frequency and OCR2B to control the duty cycle, and have output on pin 3 (OC2B). (You are not expected to understand this. See my article on Secrets of Arduino PWM for details of how these timers work.)
#define freq_to_timerval(x) (F_CPU / 8 / x - 1)
...
    pinMode(IRLED, OUTPUT);
    TCCR2A = _BV(COM2A0) | _BV(COM2B1) | _BV(WGM21) | _BV(WGM20);
    TCCR2B = _BV(WGM22) | _BV(CS21);
...
    OCR2A = freq; 
    OCR2B = freq / 3; // 33% duty cycle
Another tricky thing is the original firmware stores the IR codes in program space, not RAM. The microcontrollers use a Harvard architecture, which means they have separate memory and data paths for code and data, unlike normal processors that use a von Neumann architecture. Because RAM storage is so small on these microcontrollers, the IR codes are stored in program space, with the result you need to use special methods to access them, rather than normal C pointers. Program memory storage is indicated with the PROGMEM macro and pulled out of memory using special functions such as pgm_read_byte. This makes the code somewhat confusing, for example:
const struct IrCode *NApowerCodes[] PROGMEM = {
  &code_na000Code,
...
}

data_ptr = (PGM_P)pgm_read_word(NApowerCodes+i);  

The original firmware stores the codes as compressed indices into tables of durations. See the TV-B-Gone design for details. Unfortunately, the Arduino's compiler didn't like the zero-length array in the IrCode structure, so I needed to rewrite the long file of codes to include another level of indirection.

Apart from these factors, porting was straightforward, and I tried to keep the original code where possible. I ripped out all the power-up and watchdog code. I replaced the low-level serial code with the Arduino's Serial library. Finally, I packaged it up into an Arduino sketch, which you can download. (Update: get the improved version here.)

The hardware

The hardware is straightfoward. I use pin 13 for the status LED; some Arduinos conveniently have an LED already wired up. Pin 3 is the PWM output to the IR LED through a 100 ohm resistor. If you want more range, add a driver transistor and use multiple IR LEDs. Pin 0 (update: pin 5) selects North American or European codes; leave it unconnected for North America and ground it for European. Pin 1 (update: 2) is connected via a pushbutton to ground to trigger the code transmission. (Update: pins have changed in the new version.)

To use the Arduino TV-B-Gone, point the IR LED at your TV, push the button, and your TV should turn off when the circuit hits the right code, which could take up to a minute. The visible LED should flash for each code that is transmitted. If the circuit doesn't work, use a cellphone camera to verify that the IR LED is transmitting. Don't expect more than a few feet range unless you use a transistor to increase the power. The code will print debugging output to the serial port if you set DEBUG in main.h.

Summary

Is the Arduino TV-B-Gone practical? If you want a TV-B-Gone that you can carry around to amaze your friends, the kit or product is much more compact, has high-powered IR outputs for longer range, and is nicely packaged. However, the Arduino platform is convenient for experimenting, and many people already have it, so I expect people will find it interesting.

You might wonder why I'm not using my Arduino Infrared Library for this project. Actually, I plan to at some point, but I wanted to get the straightforward port working first. In addition, my library will need some extensions to support all the codes that the TV-B-Gone supports.

I hope you enjoy the Arduino TV-B-Gone, and remember to use it for good, not evil!