This post describes how we repaired the monitor from a Xerox Alto. The Alto was a revolutionary computer, designed in 1973 at Xerox PARC to investigate personal computing. Y Combinator received an Alto from computer visionary Alan Kay, and I'm helping restore this system, along with Marc Verdiell, Luca Severini, Ron Crane, Carl Claunch and Ed Thelen. You may have seen Marc's restoration video (below) on Hacker News; my article describes the monitor repairs in more detail. (See my first article on the restoration for more background.)
The Alto display
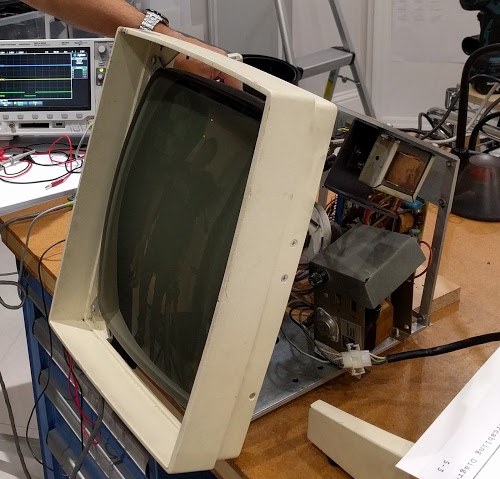
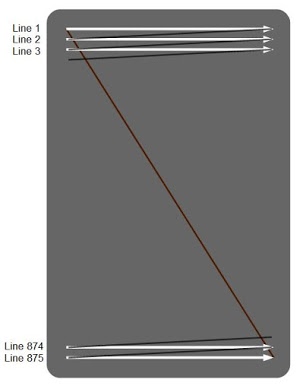
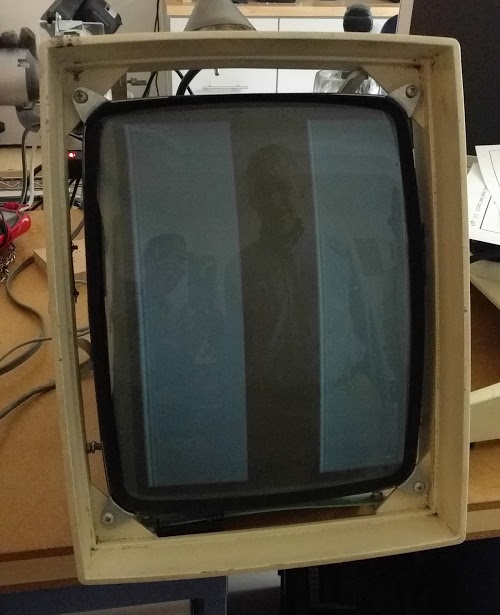
One of the innovative features of the Alto was its 606 by 808 pixel bitmapped display, which could display high-quality proportionally spaced fonts as well as graphics. This display led to breakthroughs in computer interaction, such as the first WYSIWYG text editor, which could print formatted text on a laser printer (which Xerox had recently invented). This editor, Bravo, was written for the Alto by Charles Simonyi, who later wrote Word at Microsoft. (I discussed the Bravo editor in more detail last week.)As you can see from the photos, the Alto's display has a somewhat unusual portrait orientation, allowing it to simulate an 8½x11 sheet of paper. Custom monitor hardware was required to support the portrait orientation, which uses 875 scan lines instead of the standard 525 lines. The Alto's monitor was based on a standard Ball Brothers computer monitor with some component values changed for the higher scan rate. This was easier than turning a standard monitor sideways and rotating everything in software.
How a CRT monitor works
Since many readers may not be familiar with how CRTs work, I'll give a brief overview. The cathode ray tube (CRT) ruled television and computer displays from the 1930s until a decade or two ago, when flat panel displays finally won out. In a CRT, an electron beam is shot at a phosphor-coated screen, causing a spot on the screen to light up. The beam scans across the screen, left to right and top to bottom in a raster pattern. The beam is turned on and off, generating a pattern of dots on the screen to form the image.
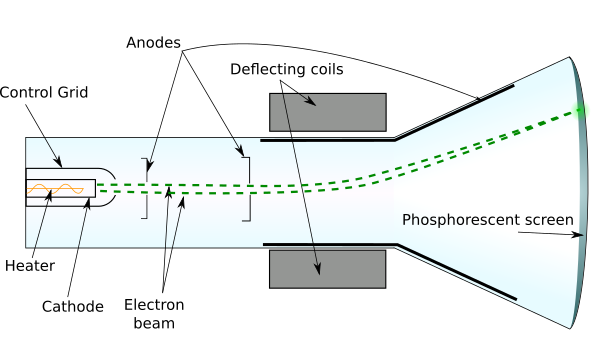
The cathode ray tube is a large vacuum tube containing multiple components, as shown below. A small electrical heater, similar to a light bulb filament, heats the cathode to about 1000°C. The cathode is an electrode that emits electrons when hot due to physics magic. The anode is positively charged with a high voltage (17,000V). Since electrons are negatively charged, they are attracted to the anode, causing a beam of electrodes to fly down the tube and slam into the screen. The screen is coated with a phosphor, causing it to glow where hit by the electron beam. A control grid surrounds the cathode; putting a negative voltage on the grid repels the electrons, reducing the beam strength and thus the brightness. Two electromagnets are arranged on the neck of the tube to deflect the beam horizontally and vertically; these are the deflection coils.
The components of the tube work together to control the image. The cathode voltage turns the beam on or off, allowing a spot to be displayed or not. The control grid controls the brightness of the display. The horizontal deflection coil scans the beam from left to right across the display, and then rapidly returns it to the left for the next line. The vertical deflection coil more slowly scans the beam from top to bottom, and then rapidly returns the beam to the top for the next image.
Monitors were built with the same CRT technology as televisions, but a television includes a tuner circuit to select the desired channel from the antenna. In addition, televisions have circuitry to extract the horizontal sync, vertical sync and video signals from the combined broadcast signal. These three signals are supplied to the Alto monitor separately, simplifying the circuitry. Color television is more complicated than the Alto's black and white display.
Getting the monitor operational
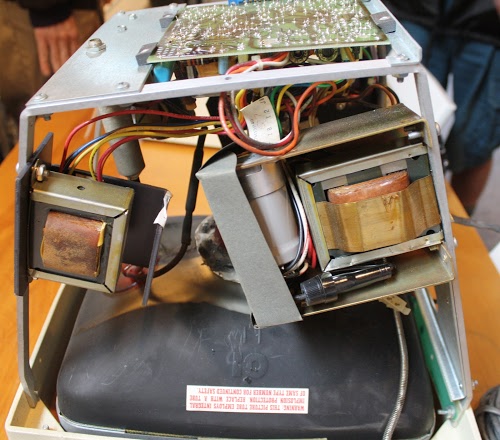
We started by removing the heavy metal case from the monitor, as seen below. The screen is at the bottom; the neck of the tube is hidden behind the components. The printed circuit board with most of the components is visible at the top. Unlike more modern displays that use integrated circuits, this display's circuitry is built from transistors. On the right is the power supply for the monitor, with a large transformer, capacitor, and fuse. On the left is the vertical drive transformer.
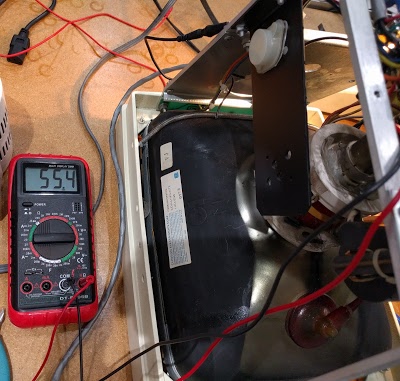
We started by checking out the 55 volt power supply that runs the monitor. This power supply is a linear power supply driven from the input AC. The input transformer produces about 68 volts, which is then dropped to 55 volts by a power transistor, controlled by a regulator circuit. (A few years later, more efficient switching power supplies were common in monitors.) It took some time to find the right place to measure the voltage, but eventually we determined that the power supply was working properly, as shown below. At the bottom of the photo below, you can also see the round, reddish connector that provides high voltage to the CRT tube; this is a separate circuit from the 55V power supply. (Grammar note: I consider CRT tube to be clearer, although technically redundant.)
At the top of the photo above, you can see the power transistor for the vertical deflection circuit. This circuit generates the vertical sweep signal, scanning from top to bottom 60 times a second. This signal is a sawtooth wave fed into the vertical deflection coil, so the beam is slowly deflected from top to bottom and then rapidly returns to the top. The vertical deflection signal is synchronized to the video input by a vertical sync input from the Alto.
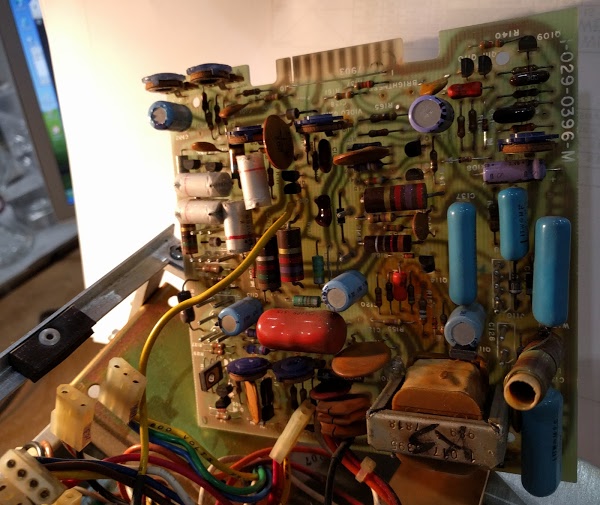
The monitor circuit board (below) contains circuitry for vertical deflection, horizontal deflection, 55V power supply regulation, and video amplification. The board isn't designed for easy repair; to access the components, many connectors (lower left) must be disconnected.
The horizontal deflection circuit generates the horizontal sweep signal, scanning from left to right about 26,000 times a second. Driving the deflection coils requires a current of about 2 amps, so this circuit must switch a lot of current very rapidly. I've heard that the horizontal circuitry on the Alto has a tendency to overheat. We noticed some darkened spots on the board, but it still works.
The horizontal deflection circuit also supplies 17,000 volts to the CRT tube. This voltage is generated by the flyback transformer. Each horizontal scanline sends a current pulse into the flyback transformer, which is a step-up transformer that produces 17,000 volts on its output. (Interestingly, phone chargers also use flyback transformers, but one that produces 5 volts rather than 17,000 volts.)
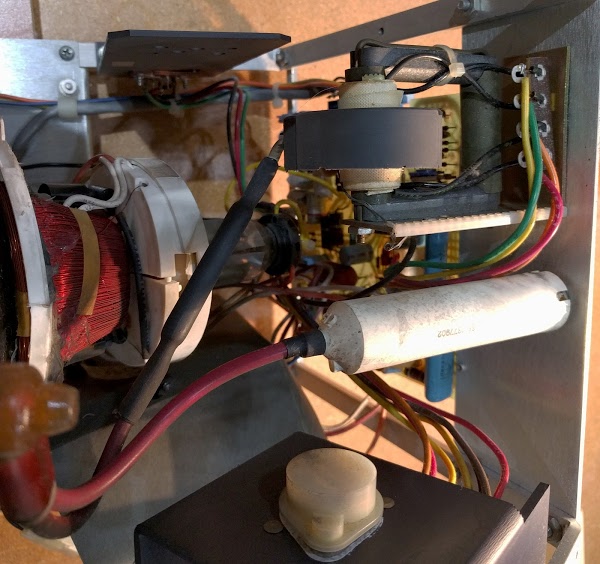
The photo below shows the flyback transformer (upper right), the UFO-like structure with a thick high-voltage wire leading to the CRT. The large white cylinder is the bleeder resistor that drains the high voltage away when the monitor is not in use. This unusually large resistor is 500 megaohms and 6 watts, and is connected to the tube by a thick, red high voltage wire. The deflection coils are visible at the left, coils of red wire with white plastic on either side. The deflection coils are mounted on the outside of the tube. At the bottom is the power transistor for the horizontal circuit.
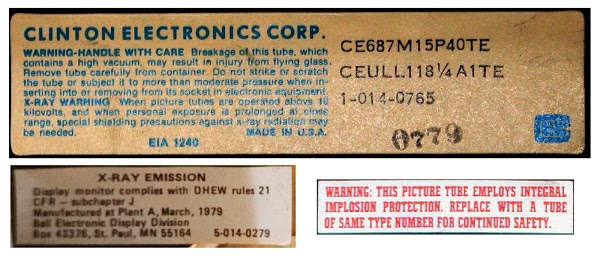
Needless to say, extreme caution is needed when working around the monitor, due to the high voltage that is present. The high voltage circuitry can be tested by holding an oscilloscope probe a couple inches away from the flyback transformer; even at that distance, a strong signal shows up on the oscilloscope. The CRT tube also poses a danger due to the vacuum inside; if the tube breaks, it can violently implode, sending shards of glass flying. Finally, X-rays are generated by using high voltage to accelerate electrons from a cathode to hit a target, just like a CRT operates, so there is a risk of X-ray production. To guard against this, the glass screen of a CRT contains pounds of lead to shield against radiation (which makes CRT disposal an environmental problem). In addition, the monitor's circuitry guards against overvoltages that would produce excessive X-rays. The photo below shows some of the safety warnings from the monitor.
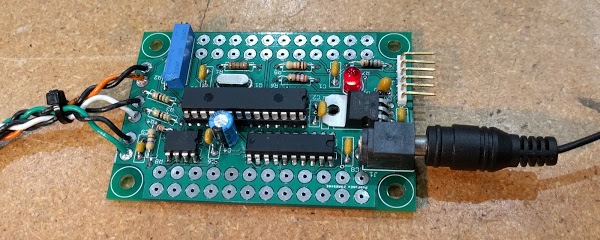
Since we don't have the Alto computer running yet, we can't use it to generate a video signal. Fortunately we obtained a display test board from Keith Hayes at the Living Computer Museum in Seattle. This board, based on a PIC 24F microcontroller, generates video, horizontal, and vertical signals to produce a simple test bar pattern on the display. We used this board to drive the monitor during testing.
We got a bit confused about which signal from the test board was the horizontal sync and which signal was the video. When we switched the signals around, we got a buzzing noise out of the monitor (see the video). Since the horizontal sync signal drives the high voltage power supply, we were in effect turning the power supply on and off 60 times a second with an audible effect. We eventually determined that Keith's test board was wired correctly and undid our modifications.
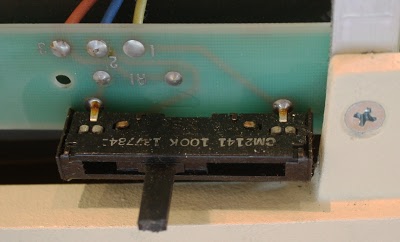
Even with the test board hooked up properly, the display didn't seem to be operational. But by turning off the room lights, we could see very faint bars on the display. We discovered that the monitor's brightness adjustment was flaky; just touching caused the display to flicker. Removing the variable resistor (below) and cleaning it with alcohol improved the situation somewhat. We tested an electrolytic capacitor in the brightness circuit and found it was bad, but replacing it didn't make much difference.
At the end of our session, we had dim bars on the display, showing that the display works but not at the desired brightness. We suspect that the CRT tube is weak due to its age, so we're searching for a replacement tube. Another alternative is rejuvenation – putting high-current pulses through the tube to get the "gunk" off the cathode, extending the tube's lifetime for a while. (If anyone has a working CRT rejuvenator in the Bay Area, let us know.)
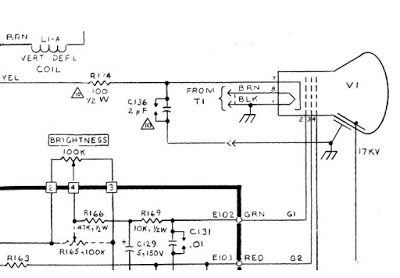
Our work on the monitor was greatly aided by the detailed service manual. If you want more information on how the monitor works, the manual has a detailed function description and schematics. An excerpt of the schematic is shown below.
The disk controller
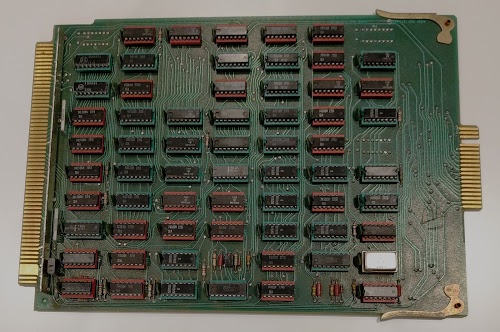
Our previous episode of Alto restoration ended with the surprising discovery that the Alto had the wrong disk controller card which wouldn't work with our Alto's Diablo disk drive. Fortunately, we were rescued by Al Kossow, who happened to have an extra Alto disk interface card lying around (that's Silicon Valley for you) and gave it to us. Below is a photo of the Alto disk interface card we got from Al. At the left is the edge connector that plugs into the Alto's backplane. The disk cable attaches to the connector on the right.
10 comments:
Chris Kuntz at pinballpirate.com has a CRT rejuvenator.
"CRT tube" == "Picture Tube"
Actually the casing was not metal, but surprisingly enough a light fiberglass casting.
Marc
>Removing the variable resistor (below) and cleaning it with alcohol improved the situation somewhat.
Regarding this, I highly recommend DeoxIT. It does far better than any alternative I've ever tried for this, including alcohol. Uh... this:
https://smile.amazon.com/Hosa-D5S-6-DeoxIT-Contact-Cleaner/dp/B00006LVEU
Before rejuvenating the tube, check to make sure everything else is good. The rejuvenator will have a tester in it as well. Causes of dim picture can be:
-Low emission (what you are suspecting), sometimes when a tube is in storage it just needs to be run a while to get better emission
-Excessive voltage on the cathode or grids
-Insufficient high voltage
-Insufficient video gain
-Insufficient heater voltage (should be 6.3)
Also if you cannot rejuvenate a weak tube, but the tube still creates a dim picture, you can borrow some time (not recommended) by increasing the heater voltage above specification (7 or 8 volts) as was done in the 50s.
Ditto what kb3pxr said! Frankly I would replace every electrolytic capacitor on that board. They do not age well and have a lifespand typically 30-40 years before they start to change value. A bad cap can easily cause a weak output, as can a resistor that's drifted in value (quite common actually).
Second, if it comes down to it and you decide the tube is shot, there are no known rebuilders left for CRTs. The Early Television Foundation (earlytelevision.org) acquired the equipment from Hawkeye, the last rebuilder, when they stopped the service in 2010. They've slowly been bringing it back up and are working toward providing CRT rebuilding services once again to the restoration community.
Ugh..submitted before finishing. Adding to the last comment, you might connect with the ETF to see if they could acquire a replacement tube (NOS with luck) or a compatible substitute.
Just wanted to say that you are doing a great job with this restoration.
Congratulations!
Jose Lizcano
I'm having a lot of fun following your progress. Please keep posting frequently! This all reminds me of when computers were for tinkering, not tweets.
IFR did a similar thing on the A-7550 and A-8000 spectrum analyzers. To achieve the needed update rates in the vertical axis, they used up-and-down, rather than horizontal scan, but the tube was mounted "conventionally" with the tube's wide axis horizontal.
The problem was that they used an off the shelf raster scan monitor assembly-generally marketed for use in cash registers as a TTL video monitor-and did not have full schematics for the device. In addition, the supplier changed internal design details on the unit several times. Each time they had to completely reverse engineer the device to modify it to their custom specifications.
I'm pretty sure there was a patent number on this but it does not come up with "IFR SYStems' or Harold Selim as an assignee or inventor.
Post a Comment